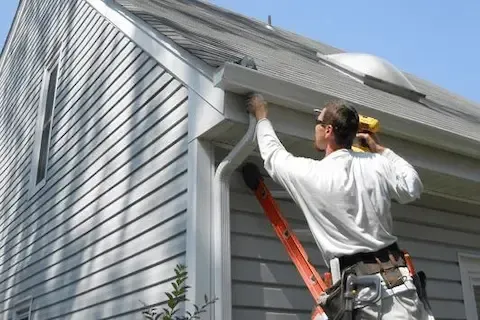
Brooklyn Park MN Gutter Installation From Start to Finish
Getting new gutters put on a home in Brooklyn Park, Minnesota involves more than just nailing up some aluminum channel and calling it a day. The process has real sequence and logic behind it — from measuring roof edges and calculating drainage loads to setting hanger spacing and positioning downspouts to handle freeze-thaw cycles that hit the Twin Cities hard every winter. When each step is done right, a gutter system can protect your foundation, soffit, and siding for twenty years or more. When steps are skipped or rushed, you end up with sagging runs, overflow at corners, and water pooling against your basement wall every spring.
Why Gutter Installation Starts with a Site Assessment
Before any material gets cut or any ladder goes up, a proper installation begins on the ground with a careful look at the home's roofline, drainage patterns, and existing fascia condition. In Brooklyn Park, where homes range from mid-century ramblers in the West Palmer Lake neighborhood to newer two-story builds closer to 610, every roofline has its own geometry.
The crew will walk the full perimeter and note a few specific things. First, they check the pitch of the existing fascia board. Gutters need to slope toward downspouts at a rate of roughly one quarter inch of drop for every ten feet of run. A fascia that has twisted or settled unevenly over time can create low spots that trap water and accelerate corrosion.
Second, they look at where water actually exits the roof — valleys, dormers, and long unbroken roof spans all shed water differently. A valley that dumps concentrated flow into a single gutter section can overwhelm a standard five-inch gutter unless it's upsized or given an additional downspout nearby. Third, they assess where downspouts can realistically discharge without sending water toward the foundation or into a neighbor's yard.
How Materials Are Selected and Measured
Seamless aluminum is the dominant choice for Gutter Installation in this region. It's lightweight, resistant to corrosion, and can be fabricated on-site in continuous runs to eliminate the seam joints that are the most common failure point in sectional systems. Copper is available for higher-end projects, but aluminum handles Minnesota's temperature swings from negative twenty in January to ninety degrees in July without cracking or contracting enough to pull fasteners loose.
Sizing decisions matter more than most homeowners realize. The standard five-inch K-style gutter handles most single-family roof sections without trouble. But when a roof pitch is steep — anything above a six-twelve pitch sheds water fast and with real momentum — or when a run is longer than forty feet, moving up to a six-inch profile reduces the risk of overflow during heavy summer rain events. Brooklyn Park sits in a zone that can see significant rainfall in July and August, and undersized gutters show their weakness during those storms.
Once sizing is set, the crew measures each run precisely. With seamless gutters, a portable roll-forming machine is set up on-site. The aluminum coil feeds through the machine and the gutter is formed to the exact length needed for each section of the home — forty-two feet, twenty-seven feet, whatever the measurement calls for. No joints except at corners and downspout outlets.
The Sequence of the Physical Installation
Installation follows a defined order that keeps each component properly supported before the next is added.
Fascia inspection and preparation come first. Any rotted or soft sections of fascia board must be replaced before hangers go in. Screwing into compromised wood is a deferred problem — it holds for a season and then fails under the weight of ice or a heavy rain event. In older Brooklyn Park neighborhoods, it's common to find a few feet of fascia that needs replacement even on homes that look well-maintained from the street.
Hanger installation follows. Hidden hanger brackets — the kind that clip inside the gutter and screw directly through to the fascia — are the current standard. They hold the gutter profile securely and don't telegraph through the face of the gutter the way spike-and-ferrule systems did in older installations. Hangers go in at intervals no greater than two feet, and closer to sixteen inches in sections where ice buildup is likely, such as north-facing eaves that stay frozen longer in late winter.
End caps and outlets are attached before the gutter run goes up. This is a detail that matters for watertight joints. The end caps are sealed with gutter sealant and crimped or pop-riveted in place, then given time to cure before the run is handled and stressed during lifting.
The gutter run is positioned and fastened. Starting from the high end — the end farthest from the downspout — the crew sets the gutter at the correct slope and works toward the outlet. Each hanger is screwed into the fascia with a three-inch screw minimum to reach solid wood behind the fascia board where the rafter tail or subfascia provides real holding strength.
Corners are fitted and sealed. Miter corners cut on-site give a cleaner fit than pre-formed angle pieces, especially on homes where the fascia angle doesn't match a standard forty-five degrees. Every corner joint gets interior gutter sealant applied thoroughly before assembly.
Downspout Placement and Drainage Logic
Downspout location isn't cosmetic — it's engineering. Each downspout handles the drainage load from its section of gutter, and that load is calculated based on roof square footage and local rainfall intensity. For most residential runs in Brooklyn Park, one downspout handles up to forty linear feet of gutter on a moderately pitched roof. Longer runs or high-pitch sections get a downspout at each end.
Downspouts are strapped to the wall at top and bottom, and at intermediate points when the run is taller than a single story. Straps need to be screwed into wall sheathing or studs — not just vinyl siding — to stay in place under winter ice loads when a downspout can become a column of frozen water that weighs considerably more than the sheet metal alone.
At the base, the downspout should discharge at least four to six feet away from the foundation. Splash blocks help on flat ground. On sloped lots — and Brooklyn Park has plenty of gentle grade changes that affect drainage — an underground extension or a flexible elbow directing water toward the yard does the job better. The goal is keeping water moving away from the foundation, not pooling against it.
Gutter Guards and Add-On Considerations
Gutter guards come up in almost every installation conversation. The oak, maple, and elm trees throughout Brooklyn Park neighborhoods like Royal Oak drop a substantial volume of debris every fall, and cleaning gutters twice a year is a real maintenance demand. Guards reduce that burden but don't eliminate it entirely.
Micro-mesh guards — the type with a fine stainless steel mesh bonded to an aluminum frame — perform best in this climate. They block most debris while still allowing water flow even during heavy rain. Surface-tension covers can work on moderately pitched roofs but tend to allow water to overshoot in heavy downpours, which defeats the purpose.
The decision on guards should be made before installation day so the system is designed with them in mind. Guards installed as an afterthought sometimes require re-removing and re-setting hangers to accommodate the added depth of the guard profile.
Common Mistakes That Show Up Later
A few installation errors are common enough to mention because they directly affect how long a system lasts and how well it works through Minnesota winters.
Improper slope is the most frequent. Gutters installed level rather than pitched collect standing water, which accelerates corrosion and creates the perfect freeze-thaw cycle for cracking seams. A quarter inch per ten feet sounds minimal, but it makes the difference between water draining completely after a rain and water sitting in the gutter for days.
Inadequate hanger spacing fails under ice. When an ice dam forms and the weight of ice and water loads the gutter, hangers spaced too far apart allow the gutter to deflect and pull away from the fascia. Once a gutter pulls even slightly away, it no longer catches full drainage off the roof edge, and fascia and soffit begin taking water damage.
Downspouts too close to the foundation cause slow, cumulative damage that doesn't announce itself until you have a wet basement or a crack in the footing. The discharge point needs to be part of the plan from the beginning, not an afterthought on the way off the property.
What to Expect After Installation
A quality installation crew will walk you through the finished system before packing up. They should demonstrate the slope visually or with a water test, point out each downspout discharge location, and identify any areas where seasonal monitoring is worth doing — particularly on sections of the roofline with heavy shade or north-facing exposure where ice formation happens earlier and lasts longer.
For background on how roof ventilation interacts with gutter performance and ice formation at the eaves, the ridge vent setup walkthrough covers that relationship in useful detail. Proper attic ventilation reduces the temperature differential that drives ice dam formation, which in turn reduces the stress your gutters face every winter season.
A well-installed gutter system on a Brooklyn Park home should require nothing more than twice-yearly cleaning and an annual visual inspection for the first decade. At the ten to fifteen year mark, sealant at corners and end caps may need refreshing. With seamless aluminum and quality hangers, the gutter runs themselves should last well beyond that without replacement.
