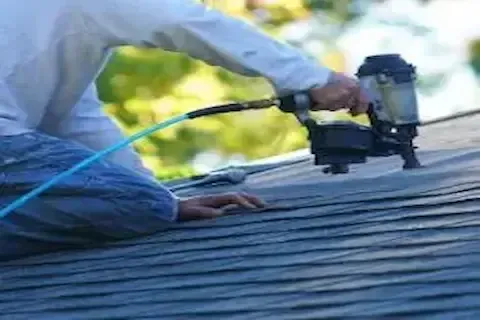
Flashing Roof Repair Around Brooklyn Park MN Chimneys
Chimney flashing is one of those components that most homeowners in Brooklyn Park never think about until water is already running down the inside of a wall. The flashing is the thin metal barrier that bridges the gap between your chimney and the surrounding roofline, and when it fails, it creates a direct path for water to reach the decking, insulation, and framing below. Minnesota winters are especially hard on this connection point. Freeze-thaw cycles force small gaps open, ice dams build pressure at the base of the chimney, and years of thermal expansion pull sealant away from masonry. By the time you notice a stain on your ceiling, the damage may already be deeper than it looks.
What Chimney Flashing Actually Consists Of
Residential chimney flashing is not a single piece of metal. It is a layered system designed to handle movement between two structures that shift independently. The base flashing runs horizontally along the bottom edge where the roof meets the chimney. Step flashing runs up both sides in individual L-shaped pieces that interlock with each course of shingles. Counter flashing, sometimes called cap flashing, is embedded directly into the mortar joints of the chimney and folds down over the step and base flashing to prevent water from getting behind it. At the back of the chimney, a saddle or cricket is often installed on steeper roofs to divert water around the high side rather than letting it pond.
Each of these layers plays a role, and each can fail independently. In Brooklyn Park, the most common failure points are the counter flashing pulling out of deteriorated mortar joints and the sealant along the base flashing cracking from UV exposure and temperature cycling. Galvanized steel flashing installed ten or fifteen years ago on homes throughout the north metro has a shorter service life than copper or aluminum in this climate, and many of those installations are now reaching the point where repairs or full replacement are necessary.
Signs the Flashing Around Your Chimney Is Failing
Water stains on the ceiling near the chimney are the most obvious sign, but they are rarely the first. Before visible interior damage appears, you may notice discoloration on the mortar or brick at the base of the chimney, efflorescence forming on the masonry, or small rust streaks running down from the flashing edges. From the roof level, loose or lifted flashing sections are visible to anyone who gets close enough to look. Gaps in the sealant line, particularly at the corners where the base flashing meets the step flashing, are common entry points that go unnoticed until they widen enough to let significant water in.
If you have had your roof inspected recently or had any work done following last winter's ice dams, ask specifically whether the chimney flashing was evaluated. Many general inspections treat the chimney as a secondary item and miss early-stage deterioration that a focused inspection would catch. Brooklyn Park homeowners who have older brick chimneys should be especially attentive, because the mortar holding the counter flashing in place weathers at a different rate than the brick itself and can loosen years before the chimney shows any other problems.
How Roofers Approach Chimney Flashing Repair
A proper chimney flashing repair starts with a thorough assessment of what is actually failing. If the counter flashing has pulled free from the mortar joints but the metal is still in good condition, a roofer may be able to repack the joints with fresh mortar, reset the flashing, and reseal. If the base or step flashing has corroded, been bent out of shape, or was improperly installed in the first place, full replacement is more appropriate than patching. Applying a thick bead of sealant over failing metal is a temporary measure, not a repair.
When replacing flashing, the surrounding shingles need to be carefully removed and reinstalled. Step flashing pieces are woven in with each course of shingles, so you cannot swap them out without lifting the roof material on both sides of the chimney. A roofer who tries to replace chimney flashing without removing any shingles is almost certainly applying surface sealant rather than doing a real repair. The new flashing should match the profile of the chimney and extend far enough up the masonry to account for normal water travel during heavy rain.
For Roof Repair work involving chimneys, the quality of the final seal matters as much as the metal itself. Polyurethane roofing sealant is the current standard for the top edge of counter flashing because it remains flexible through temperature changes and bonds well to masonry. Butyl tape is sometimes used at the step flashing joints before the sealant is applied. Avoid contractors who use standard silicone caulk as a primary sealant on roofing applications — it does not adhere well to wet or cold surfaces and will fail faster than the rest of the repair.
When a Chimney Flashing Problem Requires More Than Flashing Work
Sometimes the flashing is not the root problem. Chimney mortar that has deteriorated significantly will not hold new counter flashing reliably, and a roofer working on the flashing alone may find that the masonry needs tuckpointing before the repair can be completed properly. A deteriorating chimney crown, the concrete cap at the top of the chimney, can also allow water to travel down the inside of the chimney shaft and appear as moisture near the flashing area even when the flashing itself is intact.
If there is existing water damage to the decking or the framing directly below the chimney, that needs to be addressed as part of the project. Rotted decking at the chimney base is common on older homes in Brooklyn Park where flashing failures went unrepaired for multiple seasons. Reinstalling new flashing over compromised decking creates the same problem again within a few years.
Understanding the difference between these scenarios is part of the reason it is worth reading up on patching versus replacing the roof before making decisions about the surrounding work. A localized chimney repair may be all you need, or it may be the first step in identifying a broader area of the roof that needs attention.
Timing and Local Weather Considerations
In Brooklyn Park, the ideal window for chimney flashing repair runs from late spring through early fall. Sealants and roofing materials need surface temperatures above forty degrees to cure and bond properly, and summer gives contractors the longest working window. That said, roofing crews do work through October and into November when weather allows, and minor repairs can be completed on dry days even in cooler temperatures.
Do not wait until spring if you notice signs of active water intrusion this fall. Water that enters at the chimney flashing during a wet November or through a January ice dam will sit in the decking all winter and cause far more damage than the original flashing failure. Address it when you see it, with the understanding that a roofer working in cold conditions will take the limitations of cold-weather installation seriously.
